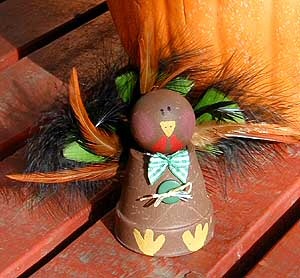
Body - Place newspaper down on work surface. Turn clay pot over and glue wooden ball to bottom of pot. When glue is dry, use large paint brush to paint entire the outside of the clay pot and the entire wooden ball with brown paint. Let dry and apply a second coat. When dry, use large paint brush to fleck on spots of tan paint for effect. This does not have to be perfect! Using small paint brush, paint on feet and beak, use the photo as a guide if needed.
Head - Use small paintbrush to paint on the gobbler in red. Dab large paintbrush or stencil dotter in rose paint. Dab onto newspaper or paper towel until all excess paint is removed. Gently dab onto "cheeks" of turkey's face. With the black fine tip marker, drawn on eyes and dot nostrils onto beak. Spray entire surface with clear coat.
Finishing Touches - Glue miniature bow tie in place, or fashion a simple bow out of ribbon and glue in place. Trim excess to suit your tastes. Tie a piece of jute or raffia through the holes of the green button. Tie a bow and trim excess. Glue button to the body below the bow tie. Glue feathers to the back so that they stick up above the back of the turkey's head.