All Craft Fun!

Pearl Bunny Earrings - Beaded Bunny Dangle Earrings - Free Jewelry Pattern

DIY Bunny Earrings, Perfect for Spring

Hop into spring with these adorable DIY Bunny earrings. These great DIY pearl bunny earrings are the perfect accessory for the season, or really, any time you want to add a touch of sweetness to your look. The beauty of these earrings lies in their simplicity. They don't require complicated techniques or expensive materials. A few well-chosen pearls, some earring findings, and a little bit of creativity are all you need to bring these adorable bunnies to life. Their simple design and easy construction make them a delightful crafting project, even for beginners. Made with classic pearl colors, you can customize them to match your favorite outfits or create a whole rainbow of bunny friends. While classic white pearls are always a chic option, don't be afraid to experiment with pastel pearl colors. Imagine delicate pink bunnies for a sweet and feminine touch, or soft lavender bunnies for a touch of sophisticated charm. A mix of pastel colors can create a playful and eye-catching set. So gather your supplies and get ready to hop into a world of crafting fun! These pearl bunny earrings are the perfect way to express your creativity, add a touch of whimsy to your style, and share the joy with loved ones. Whether you make them for yourself or as a gift, these adorable earrings are sure to bring a smile to everyone's face. Happy crafting!


Instructions:

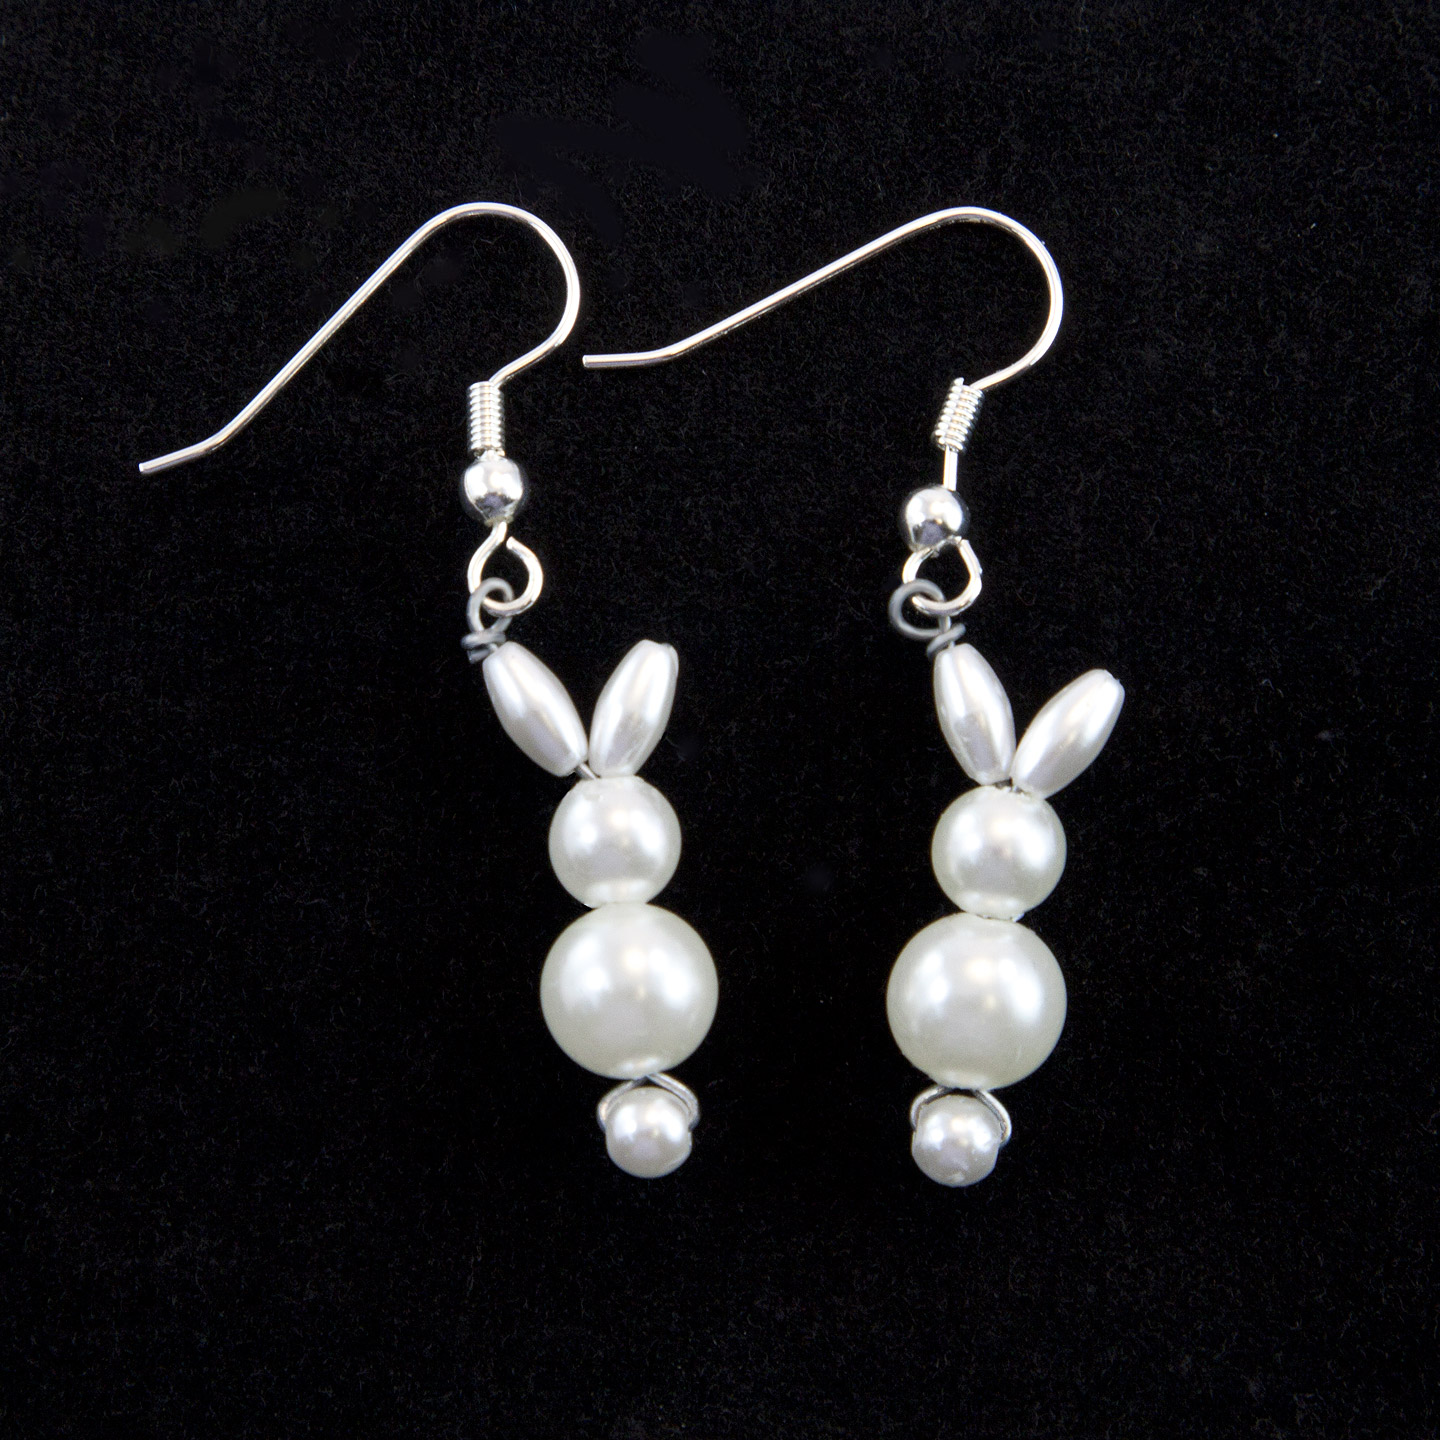
While the illustrations show the fish hook style of ear wire you can use whatever style you prefer. Using a jumpring between your earring hook and your bunny is optional but it may help your bunny dangle to hang a little smoother and it is easy to do. Our instructions will assume you are using a jumpring.

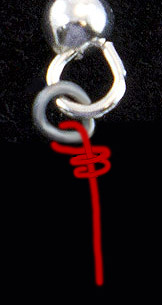
Add a jumpring to your earring hook and close it. See instructions at the bottom of this page if you have never opened a jumpring.
Adding a jumpring to your ear hooks

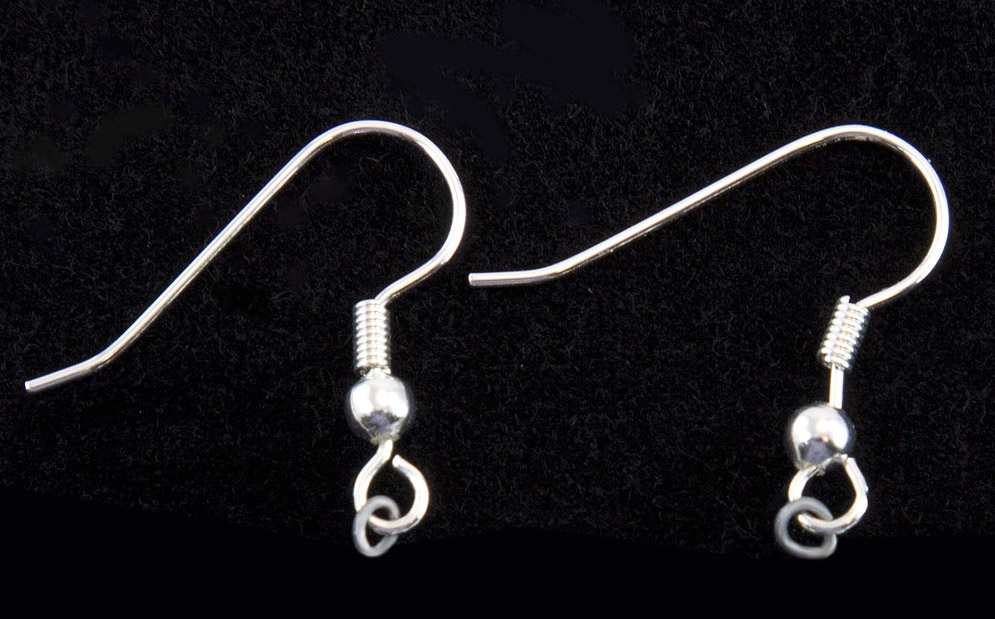
Cut a 3 1/2" piece of wire and insert it into the jumpring (or earring hook loop). Bend the wire so that about 1/2" of the wire is on one side and 3" is on the other side. With your jewelry pliers gently wrap the short side of the wire around the long side about 3 times.

Inserting the wire into the earrings.   Inserting the wire into the earrings.

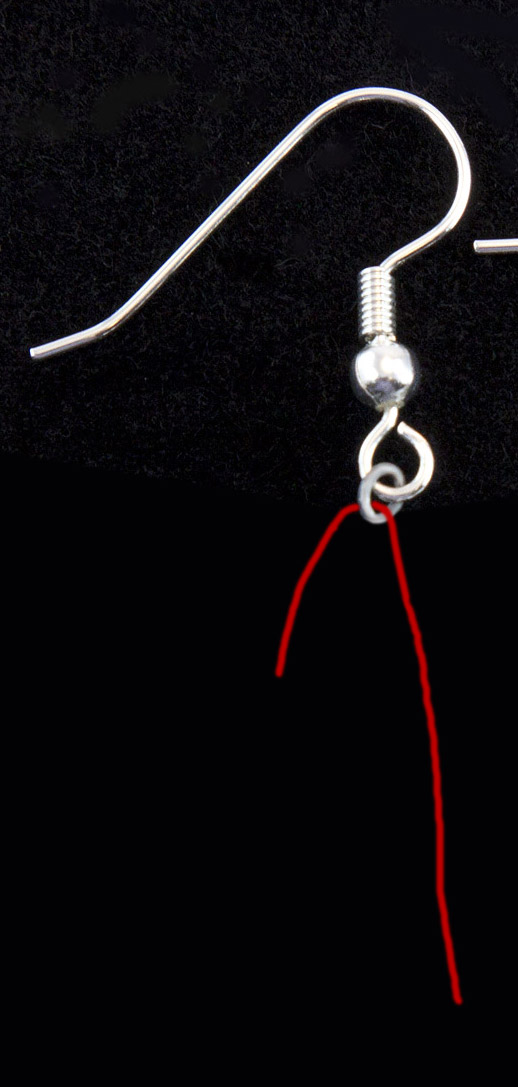
Thread a 3 x 6 oval bead, one 6mm pearl, one 8mm pearl and then one 4mm pearl onto your wire. Bend the wire around and go back through the 8mm pearl, 6mm pearl and add the other 3 x 6mm oval bead onto the end. See the diagram below. The red line represents the path of the wire through your beads. For best results work as much slack out of your wire as possible after you've threaded on all 5 pearls.

Inserting the wire into the earrings.

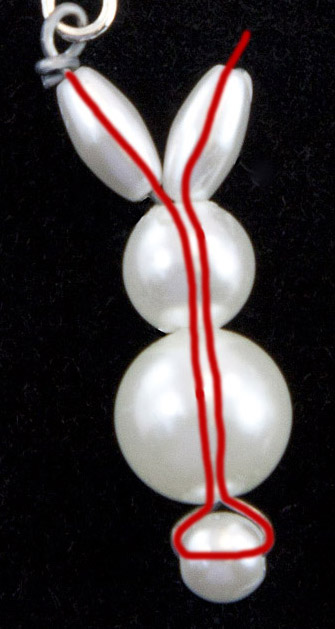
Once you get as much slack out of it as you can, bend the wire over the tip of the last 3 x 6mm oval bead and cut to about 1/8" long. Press the wire down against the oval bead.

Repeat for the other earring.

Alternate design: Bend the 4mm pearl up and to the back to represent the bunny's cottontail.

 
Please Read:
We realize that ads can be annoying at times but won't you please consider supporting this free pattern by turning off your ad blocker (if you have turned them off) and reviewing the ads shown on this page and clicking on one that interests you. Any revenue generated helps pay for the costs of providing you with more patterns! Its a win, win situation for us all!
We sincerely thank you!


Menu


Please Read:
We realize that ads can be annoying at times but won't you please consider supporting this free pattern by turning off your ad blocker (if you have turned them off) and reviewing the ads shown on this page and clicking on one that interests you. Any revenue generated helps pay for the costs of providing you with more patterns! Its a win, win situation for us all!
We sincerely thank you!
 

Your donations help us to be able to add more free craft patterns to this site for you. We Thank You.
All Craft Fun!


Copyright 2004-2025, All Rights Reserved