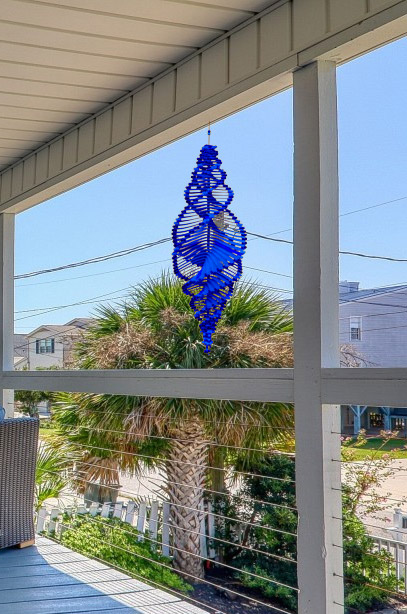
Wind spinners add a touch of personality and movement to any outdoor space, whether it's a vibrant garden, a breezy porch, or even a sunny balcony. While wind spinners can be crafted from a multitude of materials, plastic canvas offers a great blend of affordability, versatility, and ease of use that makes it a fantastic choice for the DIY enthusiast.
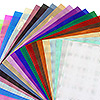
Why do I prefer plastic canvas? You can find plastic canvas sheets online, at some craft stores and even some larger retailers. It's readily available, and comes in a large variety of colors, allowing you to create wind spinners that perfectly match your personal style and surroundings.
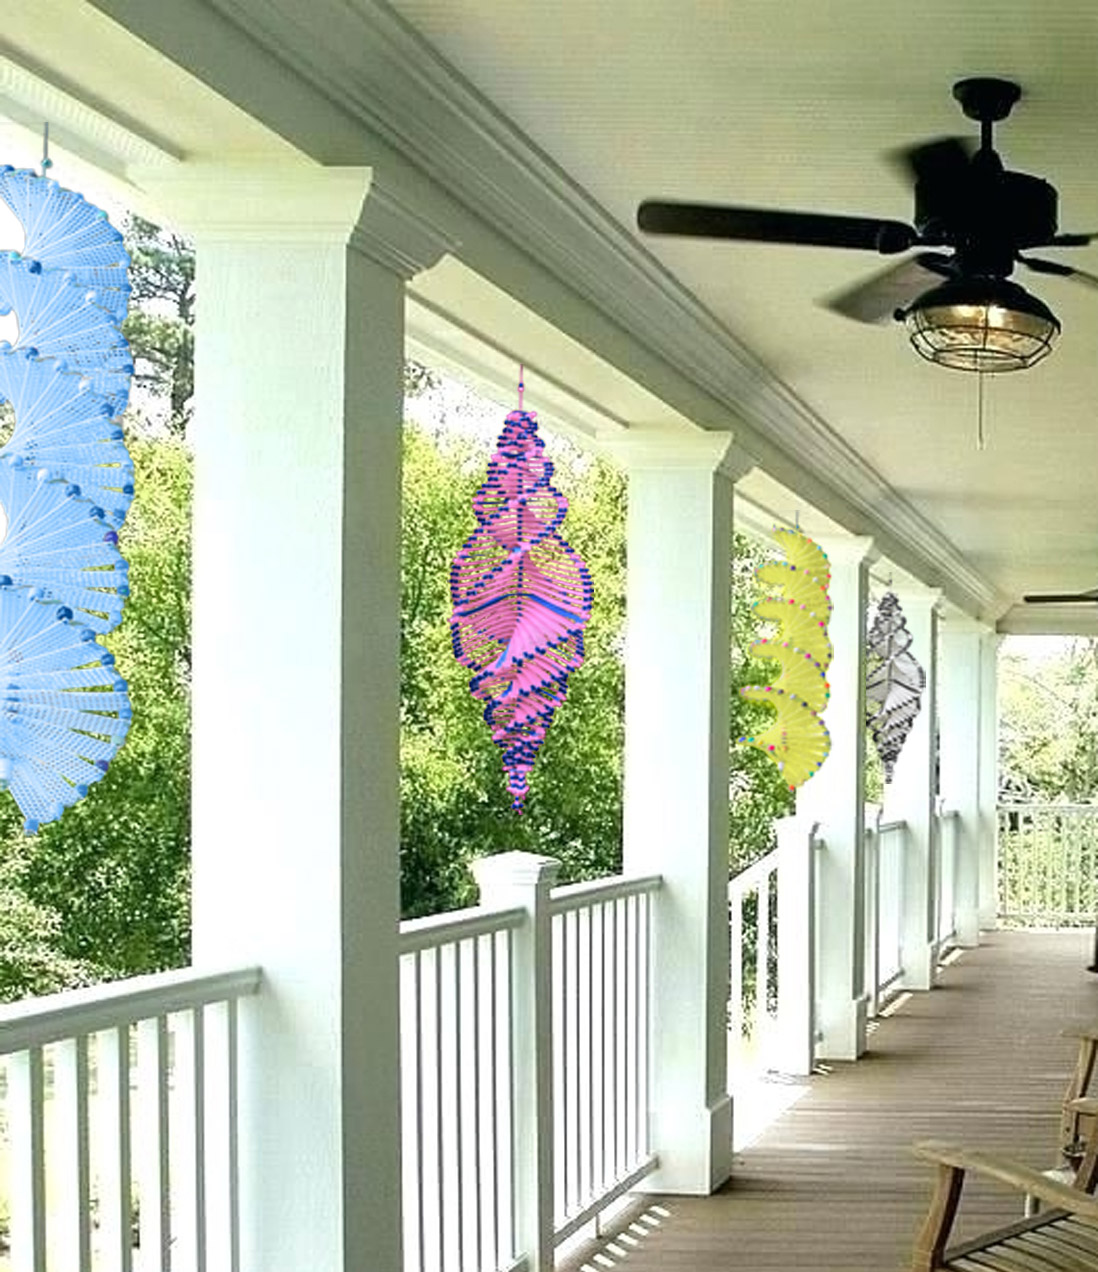
The grid-like structure of plastic canvas makes it easy measure and cut, shape, and connect pieces. Most plastic canvas wind spinners use simple, rectangular shaped pieces making the cutting out process quite simple. You can also create geometric designs, intricate patterns, or even whimsical characters to dangle beneath your spinner for an even more personalized appearance.
While lightweight, plastic canvas is surprisingly durable and weather-resistant, making it suitable for outdoor use.
Compared to other crafting materials, plastic canvas is relatively inexpensive, allowing you to experiment and create multiple wind spinners without breaking the bank.
If you're looking for a fun, engaging project that's both visually appealing and surprisingly simple, look no further than plastic canvas wind spinners. Let's explore why plastic canvas is such a great medium and dive into the basics of creating your own spinning art! Here's a basic outline to get you started. Remember that this is just a launching point – let your creativity run wild!
Note: For your convenience and to assist you in being able to locate the material required for this project, some (or all) of the materials listed may be linked to other websites or contain affiliate links. All will open into a new window so that you don't lose this pattern page.

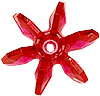 18mm sunburst
 pony beads.

 Plastic canvas hole counter. (Optional. You can just count the holes)
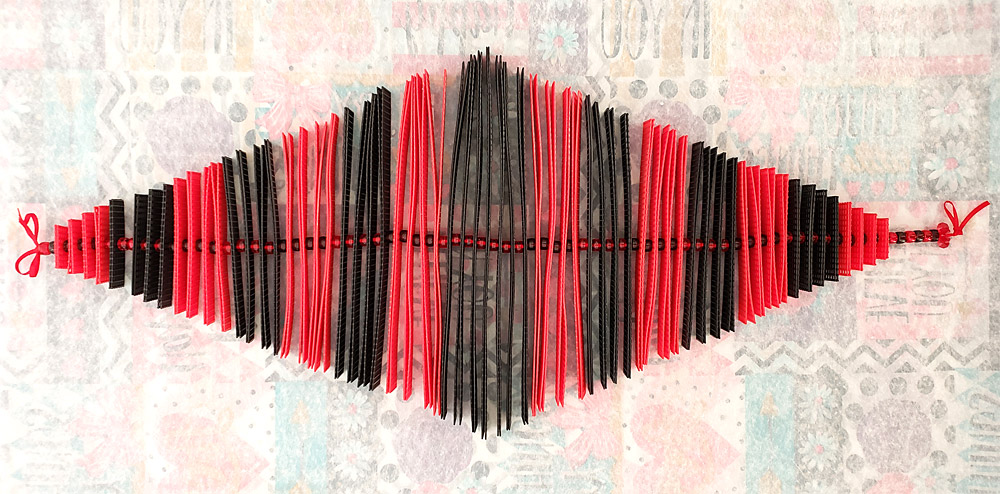
Decide on the shape and design of your wind spinner. Most (and easiest to make) wind spinners made with plastic canvas are done using long, rectangular shaped pieces so that you can nest them beside each other to capture the breeze . You can also find patterns online for more complex designs.
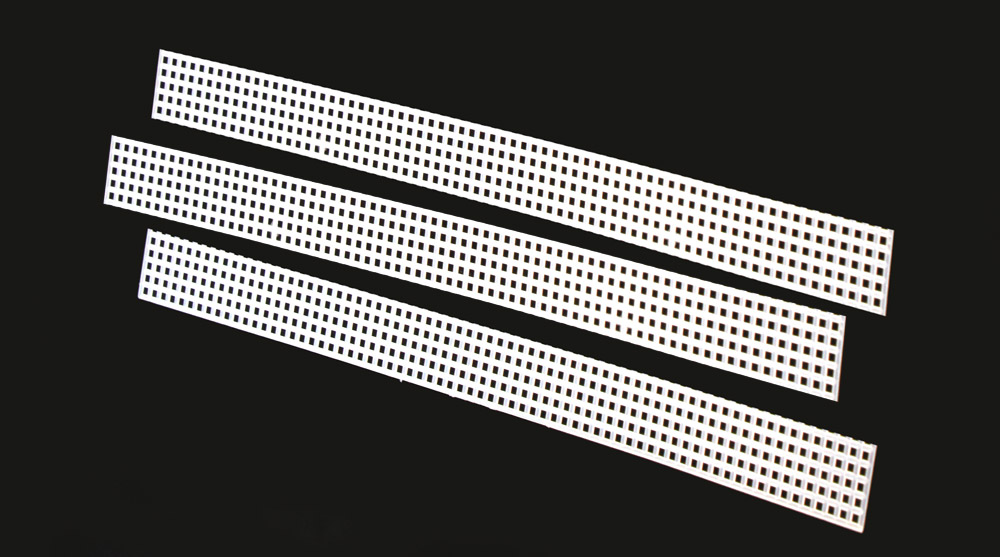
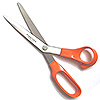
Use your scissors or craft knife to cut the plastic canvas into the desired shapes. You want your cuts to be clean and pretty smooth. I usually cut my piece and then go back and cut all the little "knobs" off of each piece. You will want an ODD number of holes in the width and length of your plastic canvas strip. This will give you a Center hole to use when stringing your plastic canvas strips.
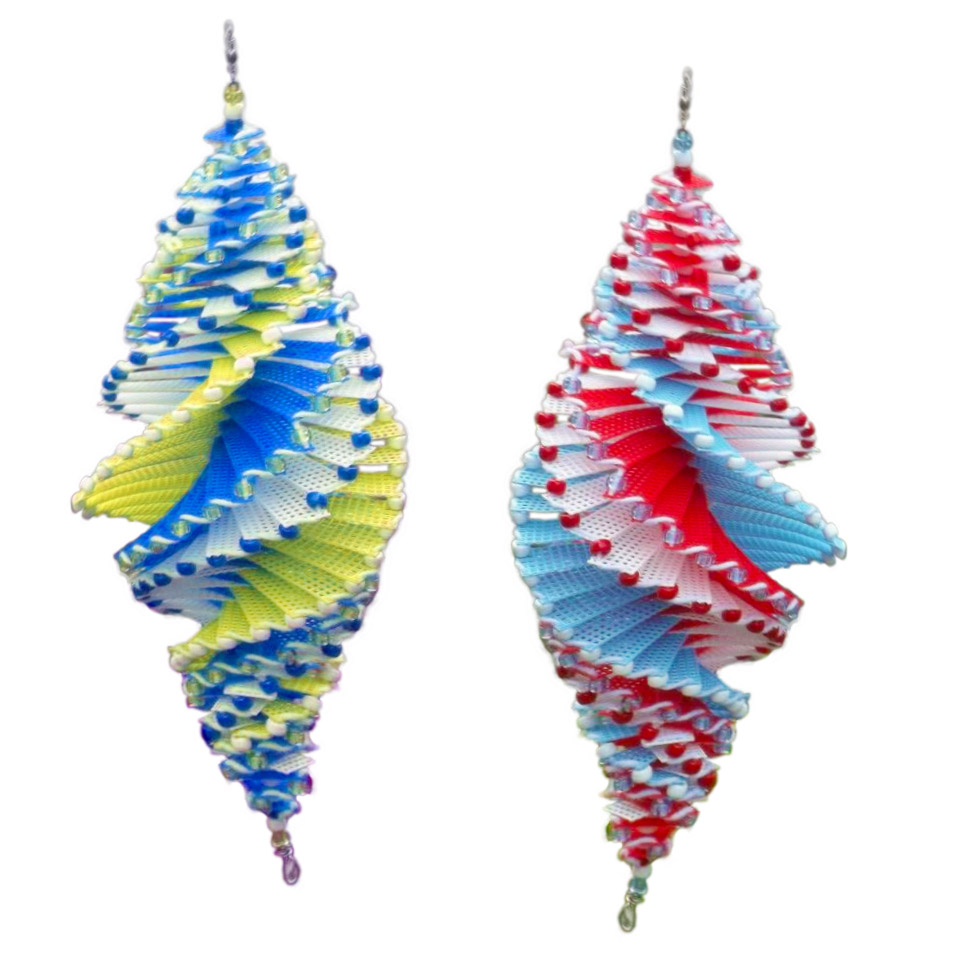
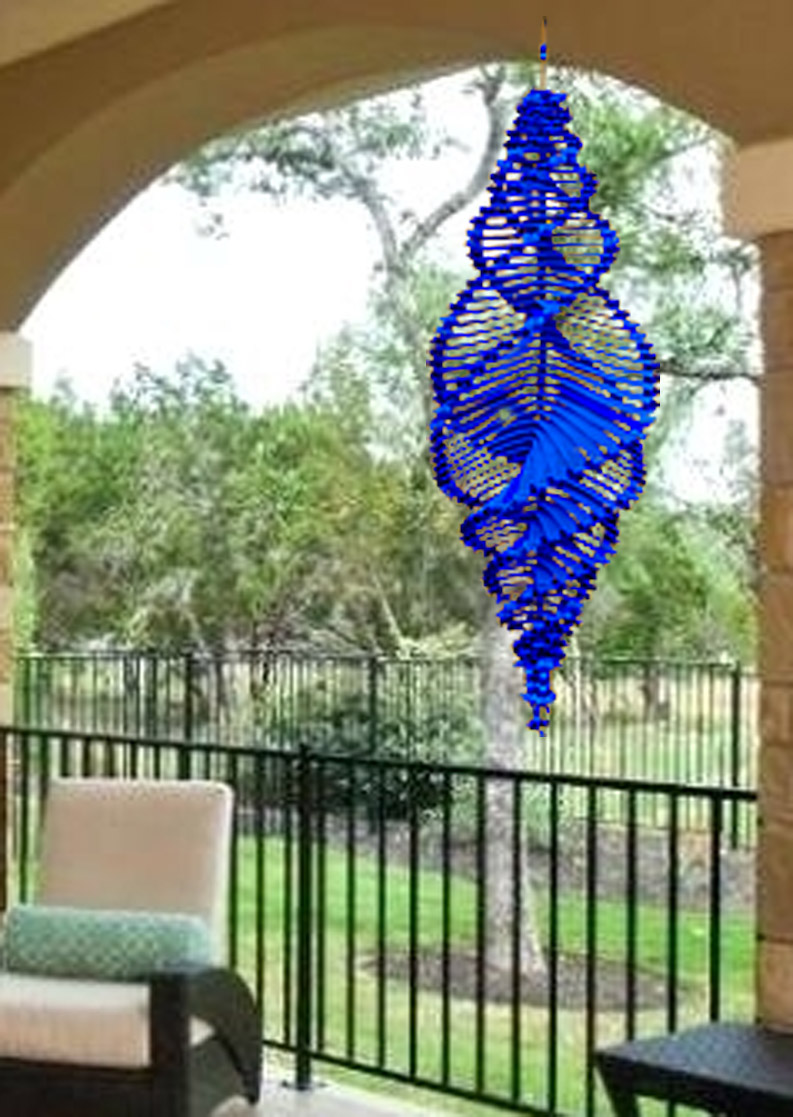
Now that all your pieces are cut lay them out in the order that you will be using them. If you are making one like the yellow one then all of your pieces will be the same length and you will just need to order them by their colors. For a tapered spinner like the one I made above, you would arrange half of your pieces ranging from the smallest to the largest (which would be the middle of the spinner) and then with the other half of your pieces, from the largest to the smallest (ending at the bottom of your spinner. If you are making a double tapered spinner (which I did) then you will need to be sure to include 2 of each size as you are laying them out.

To begin assembling your wind spinner you will need a piece of cord that is double the length of your finished wind spinner plus about 12 inches extra. In other words, if your finished spinner is about 18", you will need a piece of cord that is 36" plus 12", so about 48" long. It is better to have too much than too little, you can always trim extra off of the ends when you've finished.
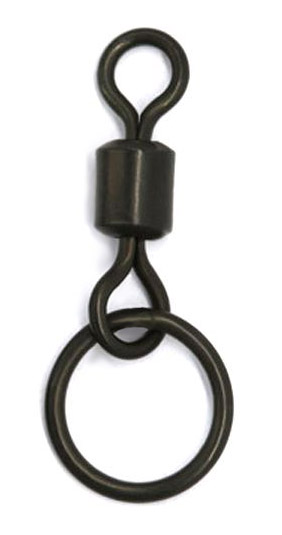
With a few of your beads, thread them onto both sides of your cord coming from your split ring and push them up to the top, next to your knot.
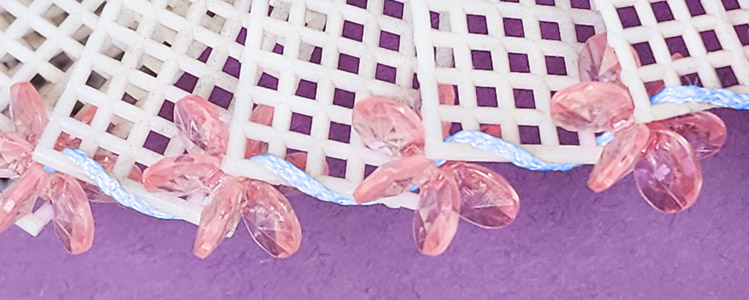
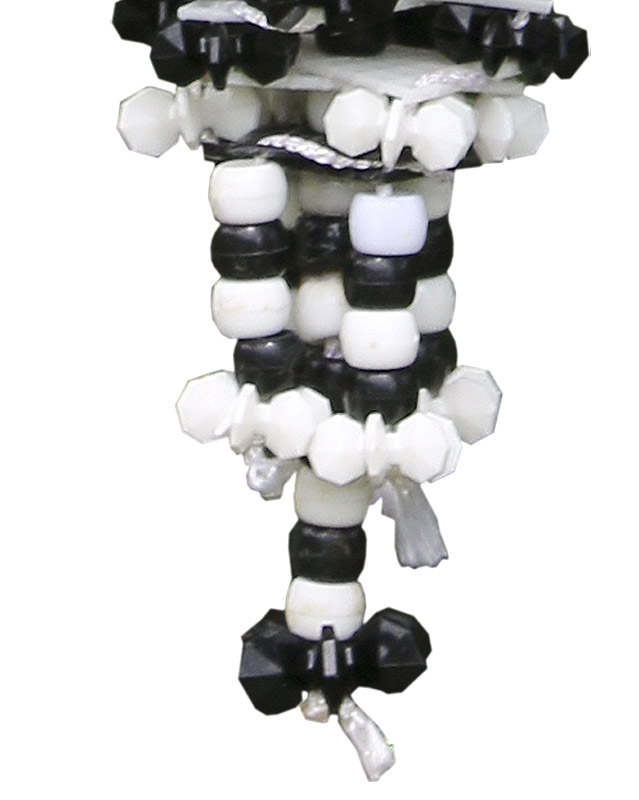
Now it is time to start adding your plastic canvas strips. For a tapered double wind spinner begin with the smallest pieces and add 2 strips followed by a color coordinated pony bead in the center. It is important to use a bead with smooth edges, like a pony bead, in the center of your wind catcher. Continue adding a pair of strips followed by a bead until you've added all of your strips.
With the extra cord you have at the end of your stack, separate your cords again and add pony beads to one side of the cord. How many depends on how long you would like the tail of your wind spinner to be. Snug the beads firmly up against the last plastic canvas strip then knot and glue. Repeat for the other cord.
The next step creates the spiral and is a little difficult to explain but it is simple to do once you get the hang of it.
Cut 2 pieces of cord that are about 4 times the length you want your spinner to be. Set one aside for later.
At the top of your wind spinner, skip the first strip (we'll come back to the first strip later) and insert the cord into the 2nd strip, from the top, down into the outside right corner . We are going to be using the 2nd strip of each pair of strips throughout this side.

Bring your cord back around from the bottom and insert your cord into the top outside left corner.
On the other end of the same strip, insert the other end of your cord down into the outside right corner hole, out of the bottom, around the strip, and back into the strip from the top into the outside left corner hole.
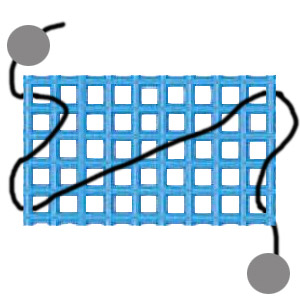
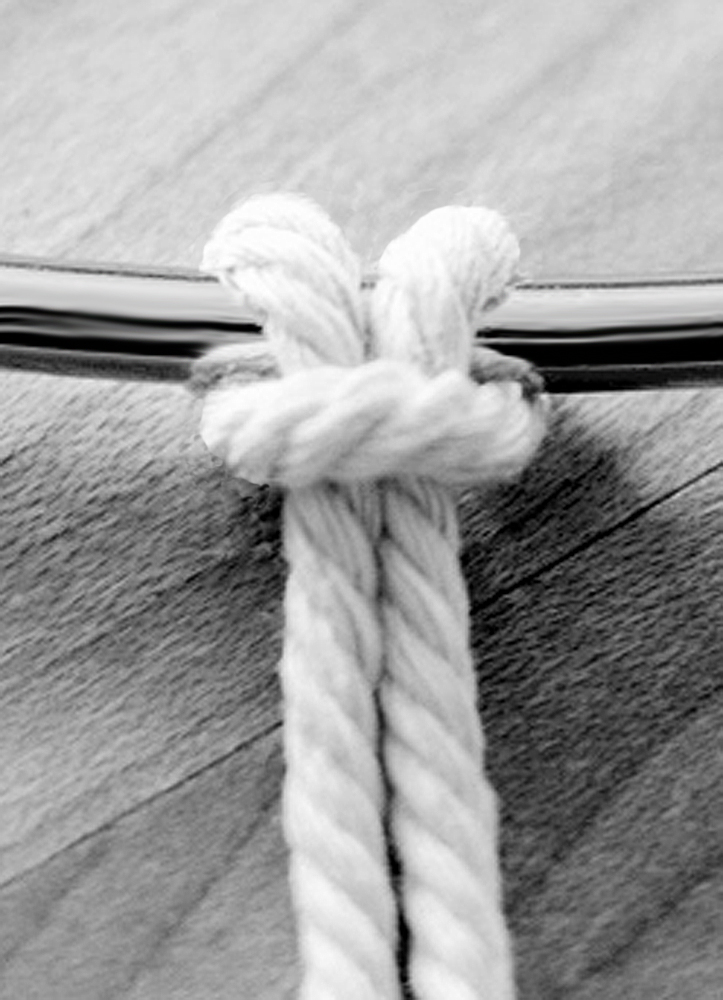
You should end up with a long cord strung through both ends of the 2nd strip, like the illustration above. Pull both sides of the cord until equal lengths of the cord are on each end of the strip and all of the slack is gone at the top.
You are only going to work with one side at a time so fold one side up into a small hank and secure with small piece of cord or wire to keep it out of your way while you are working on the other side.
Working with the side that you left free, add a sunburst bead. Now, skip the 1st piece of the next pair of strips and thread your cord through the outside right corner hole, around the end of the strip and from the top back through the left corner hole.
Next, add 2 of the next smallest pieces and another color coordinated sunburst bead.
Continue this sequence, in the order that you laid them out, always adding a bead between each strip, going into the top right corner hole, around and into the top left corner hole to the bottom, until you've used all of the plastic canvas strips. Under the last pair of strips use both of your cord pieces separately and add 8 pony beads and 1 sunburst bead to each cord and push them up snuggly against your wind spinner. Tie a knot into your cords and add a dot of non-water soluble glue to the knot so that it won't unravel.

Under the last pair of strips use both of your cord pieces separately and add between 4 and 10 pony beads and 1 sunburst bead (or however many you choose to add) to each of your cord ends. Pull the slack out and snug the beads up firmly against the last plastic canvas strip. Tie a knot into each of your cords and add a dot of non-water soluble glue to the knot so that it won't unravel. as you did for the center. Each time you come to this step vary the number of beads that you use and the color sequence, to create a staggered look. You can also add things like bells, plastic canvas shapes (your initials or a heart perhaps), glass beads, or even feathers. After the glue is dry you can safely trim any excess cord.
Below is what the bottom of your wind catcher might look like when finished.
Repeat this on the other side with the other half of the cord that you bundled up.
Once you've completed both sides with your first cord piece you will do the same thing again except that you will be working with the 1st strip of each pair.
After you have completed all 4 sides you will have created 2 separate spirals. Fan each spiral out evenly and hand where you can enjoy it.
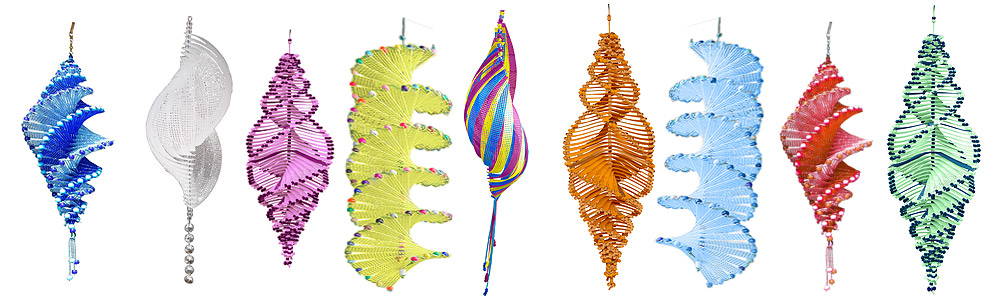
Finally, unleash your creativity! Plastic canvas wind spinners offer endless possibilities for creative expression. From simple designs to intricate, multi-layered creations and color combinations,the only limit is your imagination. So, gather your supplies, get inspired, and start crafting your own whimsical wonders to bring joy and movement to your outdoor space. Happy spinning!
For Tips and Advice for Anything Home and Garden-related check out this website: Your Home n Garden